We've moved — our showroom is now at ul. Bukowiecka 92, Warsaw.
Language
Theme
Page 18 of 23 (535 articles)
November 25, 2020 • 2 min read
Discover the top interior door colors for 2025! Embrace natural earth tones like olive green and terracotta to create a warm, inviting atmosphere in your home.
November 23, 2020 • 5
Transform your attic into a magical children's room! Discover creative design tips to make the space functional, safe, and inspiring for your little ones.
November 16, 2020 • 2 min read
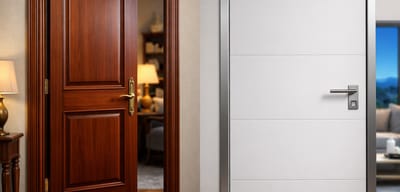
Discover the perfect door for your home with our guide on classic versus modern styles. Explore the timeless elegance of classic doors and the sleek appeal of modern designs to elevate your space!
November 15, 2020 • 2 min read
Transform your home with glazed doors that invite natural light and elegance into every room. Discover how they enhance aesthetics, well-being, and energy savings in your space.
October 30, 2020 • 2 min read
Discover how to choose the perfect garage door that enhances your building's style and functionality. Our guide simplifies the selection process, ensuring a practical yet stylish choice!
September 20, 2020 • 5
Odkryj najlepsze kolory do łazienki w technikolorze. Zmień swoją przestrzeń w unikalne miejsce pełne stylu i funkcjonalności!
September 8, 2020 • 4
Discover how energy audits assess the crucial role of doors in enhancing building efficiency. Learn about thermal insulation, sealing, and the best materials for energy-saving solutions.
September 5, 2020 • 4
Discover the ultimate showdown between the Tedee PRO and Tedee GO smart locks! Uncover their features, security, and ease of use to find the perfect fit for your home or office.
September 2, 2020 • 2 min read
Discover the perfect blend of safety and style with Asilo doors. Designed for top-level security and aesthetic appeal, these doors protect your home while enhancing its beauty.
August 28, 2020 • 2 min read
Explore the diverse range of interior door brands at DOMAR, where over 30 years of expertise meets style. Discover how Porta, Gerda, and more can elevate your home’s aesthetic and functionality!
August 26, 2020 • 5
Dowiedz się, która pergola lepiej sprawdzi się w Twoim ogrodzie. Porównaj zalety i wady pergoli przyściennej i wolnostojącej.
August 13, 2020 • 2 min read
Discover DRE doors that combine durability with affordability. Find out why they are the perfect choice for your interior!
July 19, 2020 • 2 min read
Discover how Tedee powered by Gerda is revolutionizing the hospitality industry. Check out the benefits of smart locks today!
July 16, 2020 • 5
Transform your kitchen into a nostalgic haven with retro design! Discover essential tips and vibrant styles that blend vintage charm with modern functionality for a cozy cooking space.
July 11, 2020 • 5
Discover the key to enhancing your home's curb appeal by choosing exterior doors that harmonize with your windows and facade. This guide offers practical tips and stylish inspirations for a cohesive look.
July 9, 2020 • 2 min read
Discover the stylish and reliable Porta Doors collections, featuring modern designs like the VECTOR series. Explore new arrivals that elevate your home's decor while ensuring functionality.
July 9, 2020 • 5
Odkryj, jak profesjonalne produkty PORTA Door Care mogą przedłużyć życie Twoich drzwi. Sprawdź nasze wskazówki dotyczące pielęgnacji!
June 17, 2020 • 2 min read
Discover the strength and reliability of Stalmet doors, designed for industrial environments. Enhance your facility's security and energy efficiency with these durable, high-quality solutions.
June 13, 2020 • 2 min read
Discover the allure of living on water in Warsaw's port, where urban life meets serene nature. Experience breathtaking views and a unique lifestyle that blends tranquility with vibrant city energy.
May 16, 2020 • 2 min read
Discover GERDA Velar Pro – the key that can't be duplicated. Invest in the security of your home today!
May 13, 2020 • 2 min read
Unlock the secrets of fire-rated door markings! Discover their crucial role in safety and learn how to choose the right doors to protect your space from fire and smoke.
April 23, 2020 • 2 min read
Discover Vox doors that combine functionality with modern design. Choose the perfect doors for your interior!
April 19, 2020 • 4
Discover the key differences in anti-burglary door requirements for apartments versus houses. This guide will help you choose the best security solution for your living space.
April 19, 2020 • 2 min read
Wondering which tedee lock to choose? Check out the comparison of tedee PRO and tedee GO to make the best choice for your security.